 |
| After not starting at Menard's, Gene needs a starter repair. |
My trusty old Ford pickup failed me at Menard's a couple of weeks ago. I was in the lumber yard gathering some wood for a home project, I loaded the wood in to the back, went to start the truck, and got only a clicking noise. Oh no! My truck won't start! Luckily, it is a manual transmission and I had battery power, so I rolled it fast enough to engage the clutch and start the engine to drive it home. No AAA for me this time! I had a few minutes today, so I decided to get out and fix it. Let's see what happened!
First, let's explore some of the various components of a starter. Every starter has a motor body, Bendix, and nose cone. Most have a solenoid attached.
 |
| Components of a starter. Click for a larger image. |
The nose cone acts as a support for the main shaft of the armature of the starter. It is machined to close tolerances so it will not contact the flywheel or cause the drive gear to not contact the flywheel gear. If the nose cone is broken, the starter will make a HORRIBLE sound and will eventually stop working. The nose cone is where the starter is mounted to the vehicle.
The motor body houses the commutator, armature, brushes, and planetary gears. It is basically an electric motor. Nothing exciting there.
To begin the repair, I bench tested the brand-used starter I got from the salvage yard. When buying used parts for your vehicle, it is of the utmost importance to test the parts that are bench testable before proceeding with any repairs. Starters, alternators, coils, and pretty much anything electrical is testable out of the vehicle. We wouldn't want to go through possible hours of labor to install a bad part!
To bench test a starter, simply find your jumper cables in the garage and connect them to the starter as illustrated here:
 |
| To bench test, connect the leads of the jumper cables as shown. Negative goes to the body of the starter (usually a mounting hole works good) while the positive side is clamped to both the signal terminal (small post) and the B+ terminal (large post at the top) |
Time to pull the starter out of the truck. Locate the negative battery terminal on the battery, loosen it, and remove it from the area of the post. This will ensure that all power is disconnected from the electrical system of the truck. The starter wire is constantly powered and there is no switch, so you must disconnect power directly from the battery to make a safe working environment under the vehicle. If this is not done, the battery could short to ground by touching the terminal of the starter to the frame of the vehicle or other components that may be in the way under the truck.
Locate the starter. Usually, it is located on the bottom of the engine, bolted toward the transmission. Some GM products have the starter bolted the other way, directly to the engine block. It depends on the manufacturer. Some vehicles, such as a Cadillac DeVille with the Northstar V8, require the entire upper half of the engine to be removed to gain access to the starter. They're not fun. Fortunately, this is an old 4.9 (300cid) inline 6-cylinder with a stick transmission. There's an entire ballroom to work with under there.
 |
| Find the starter motor under the vehicle bolted to the transmission. |
After bench testing this starter, I found that the solenoid had an open circuit when activated. A multitude of things could cause this, but the solenoid in a Ford is not serviceable, only replaceable. To test for a bad solenoid, connect and bench test the starter as before. If a loud 'click' is heard and nothing happens with the motor, there could be a problem with the motor as well. If no 'click' is heard, the solenoid is likely bad and can be replaced with good success. This was a sneaky little devil, so I had to test the motor itself. On the bottom of the solenoid you will see a terminal that has a braided cable connected to it that leads in to the body of the starter motor. This is the power lead for the brushes. We are going to power this terminal directly without the help of the solenoid.
After connecting the cables to the starter and the battery, I found that this starter runs like brand-new...quiet as ever. The solenoid happens to be bad, though.
I removed the solenoid from one starter and replaced it on to the other one. This can be achieved by simply removing the power lead to the brushes and the retainer bolts. It simply slides right out. After bolting the new solenoid on to my old starter, I am confident that my Frankenstein of a starter will work as designed without a trip back to the salvage yard to exchange the bad one.
 |
| Removing the solenoid is no hard task. Simply remove the wire terminal nut and retainer bolts. Installation is a reverse of removal. |
Installing the starter back in to the truck is a reverse of removal. Connect the B+ lead, then the signal lead, then bolt it in to place. Be sure the wires are far away from hot exhaust components, as this could melt through the insulation and cause a fire. Don't try to be He-Man with the bolts, either. Tighten them up tight, but not super tight. If a hole becomes stripped, that is a difficult problem to solve.
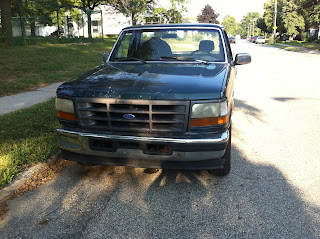
I put the starter back in the truck and it started right up! My trusty pickup lives again!
 |
| Enjoy your dirty-handed test drive. |
Great experience share Jaret
ReplyDelete